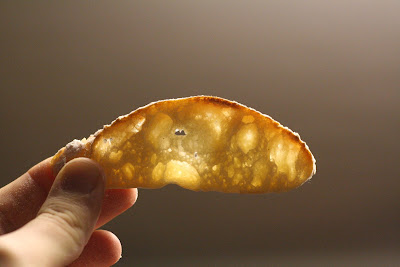
I challenged myself to a one man Throwdown::Ciabatta. I have been wanting to experiment with breads beyond the realm of Artisan Breads in Five Minutes a Day. Don't get me wrong, we still love ABi5MaD, and have a loaf of semolina in the fridge right now. I did want to try some more traditional methods however, and expand my bread baking arsenal.
I decided I would dive right into a really wet dough bread - Ciabatta. Because it has such a high water to flour ratio (hydration level) Ciabatta can be difficult to work with and doesn't take to the standard knead-the-heck-out-of-it that a bagel or sandwich dough will.
I've had Peter Reinhart's Bread Baker's Assistant for some time now, and I have made the bagel and pizza dough out of it, and I will admit, they didn't come out great for me. But because it is such a revered bread baking resource, I wanted to give it another shot. I decided I would make the Ciabatta out of BBA and also a "quick" version I found on one of my favorite bread resource sites, The Fresh Loaf.
I followed both recipes exactly, weighing my ingredients and timing my rests, fermentations etc. I made the quick version first and the results were fantastic. Great flavor, perfect crumb with large, shiny, irregular air pockets, and just the right amount of moistness. I was feeling good about my Ciabatta skills after that. The whole thing comes together in a few hours all in one day.
Great crumb, great bread, using Jason's quick version


So when I moved on to the BBA recipe that start by building a poolish that ferments and then cold retards overnight, I'm thinking - man, this thing is going to be awesome. After following the directions quite faithfully as far as I can tell, the result - eh. It tasted okay, texture was fine for a basic soft white bread, no irregular holes, no moist, saturated crumb. On the one hand, I was definitely disappointed, on the other hand, yay! the quick version rocks!
The less successful Ciabatta from BBA


I may yet give the BBA version another shot, making some modifications along the way. After all, bread baking is not about faithfully following printed instructions, but understanding a method, an idea, and understanding the nature of the dough and working with it and modifying as necessary.
But for those of you who have put off making a ciabatta or high hydration baguette, I say give Jason's Quick Ciabatta recipe a try and I think you will be very pleased.
Jason's Quick Ciabbata
Variaton 1
500g bread flour
475g (~2 cups) water
2 tsp. yeast
15g salt
Varation 2 (Semolina)350g bread flour
150g semolina flour
475-485g (~2cups) water
2tsp. yeast
15g salt
In Kitchen Aid style mixer: Mix all ingredients roughly till combined with paddle, let it rest for 10 minutes.
With the paddle (I prefer the hook to prevent the dough from crawling into the guts of the mixer), beat the living hell out of the batter, it will start out like pancake batter but in anywhere from 10 to 30 minutes it will set up and work like a very sticky dough. if it starts climbing too soon, then switch to the hook. You'll know it's done when it separates from the side of the bowl and starts to climb up your hook/paddle and just coming off the bottom of the bowl. I mean this literally about the climbing, i once didn't pay attention and it climbed up my paddle into the greasy inner workings of the mixer. It was not pretty! Anyway, it will definitely pass the windowpane test.
Place into a well oiled container and let it triple! it must triple! For me this takes about 2.5 hours
Empty on to a floured counter (scrape if you must, however you gotta get the gloop out), cut into 3 or 4 pieces. Spray with oil and dust with lots o' flour. Let them proof for about 45 minutes, which gives you enough time to crank that oven up to 500F.
After 45 minutes or so the loaves should be puffy and wobbly, now it's iron fist, velvet glove time. Pick up and stretch into your final ciabatta shape (~10" oblong rectangle) and flip them upside down (this redistributes the bubbles, so you get even bubbles throughout), and onto parchment or a heavily floured peel. Try to do it in one motion and be gentle, it might look like you've ruined them completely, but the oven spring is immense on these things.
Bake at 500F until they are 205F in the center (about 15-20 minutes), rotating 180 degrees half way through. Some people like to turn the oven down to 450F after 10 minutes, but whatever floats your boat. I usually bake in 2 batches.


4 comments:
Wow! Amazing! I really like the fast one... I like your blog a lot. Good job!
I'll come back again
I have to say that I was extra excited that the easier version turned out to be yummier! And boy, was it good!
Everytime I read one of your entries, I can't decide what I'm more inspired to do: try out your recipe or buy your camera lens.
Katie, I say definitely do both!
Post a Comment